Events - Registration Form
This Tipsheet is for county and state admins
STEP TWO: REGISTRATION FORM
Participant Registration Fields
- Click the green ‘Add Category’ button.
- Type a general title for the category. In the sample below it ties to the event title.
- Click the blue ‘Add’ button.
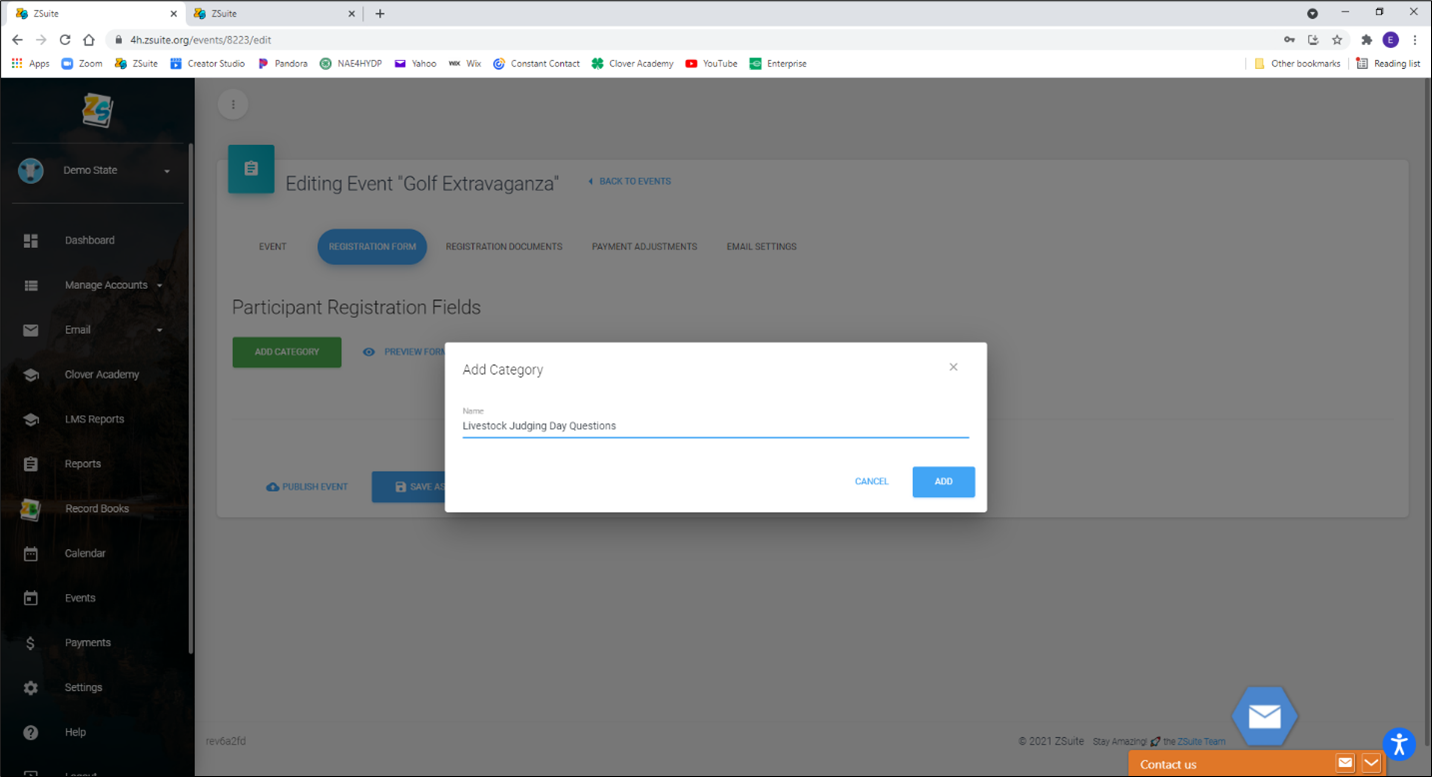
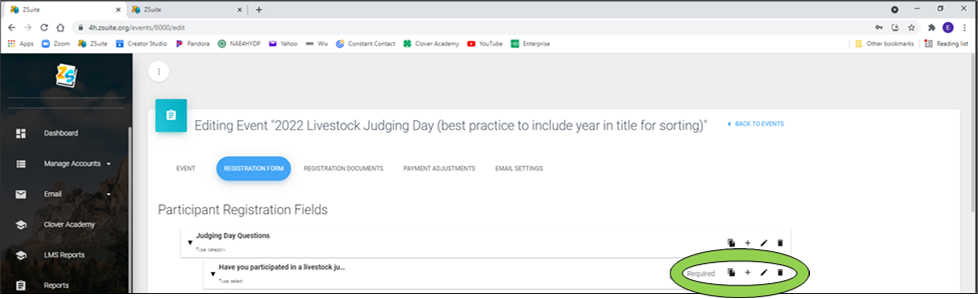
In the hierarchy of how the form is built think of category as the umbrella. The next steps include adding the questions that are to be housed under the umbrella. In the example below the category is called Judging Day Questions.
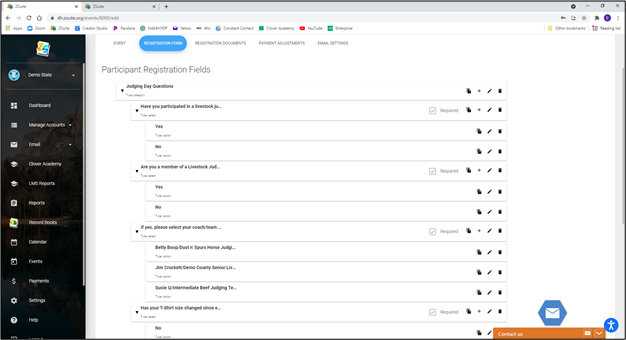
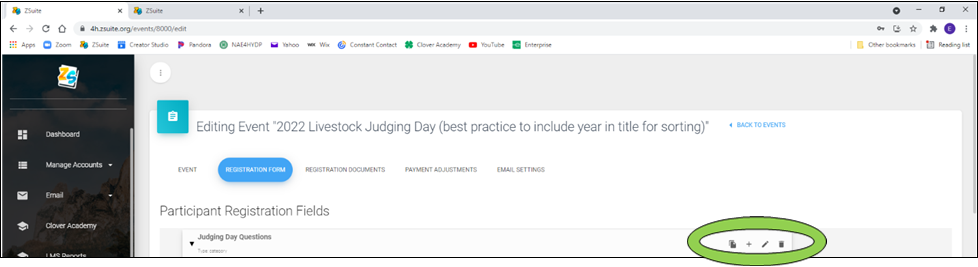
4. Click the ‘+’ sign (to the right) on your category to add a question (see example below).
There are two very important elements when it comes to the composition of your registration form. Your questions are dependent on the input type and validations.
Input Type
This section allows you to build your answer type. The dropdown menu has the following options:
- Text - This option provides a text placeholder for answers
- Single-Select - This option is for questions that are a single answer/ yes or no
- Multi-Select - This option is for questions that are check all that apply
- Date - Date response
- File - Adds a file upload option. Uploads can be .jpg or .pdf
Validations
Validations are answers that are validated on different responses. The dropdown menu has the following options:
- None
- Numeric
- Date
- Phone Number
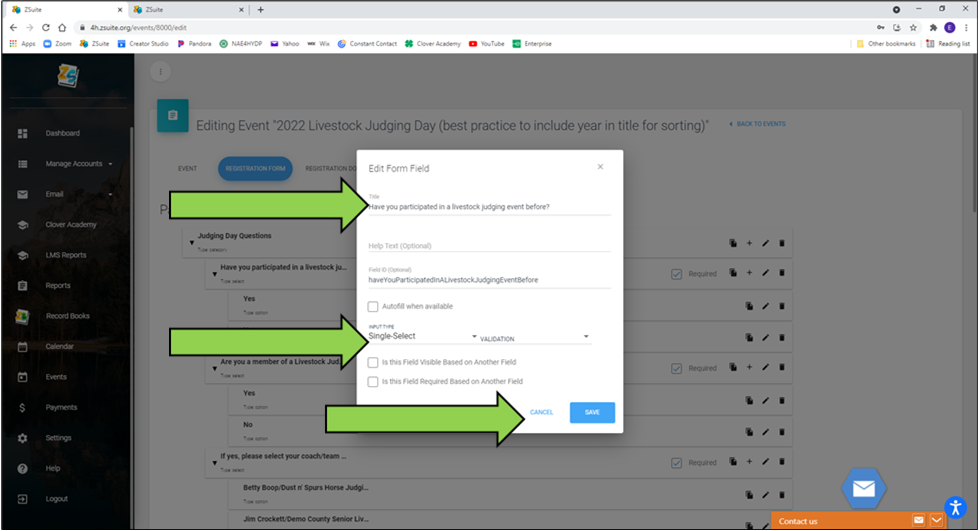
5. Enter in the title your first question. In the example below, it asks if the member has participated in a livestock judging contest before.
6. From the input type dropdown menu select ‘Single Select’ and click the blue ‘Save' button. Since respondents have one answer option (yes or no), this option allows for us to add those answer choices in the next step.
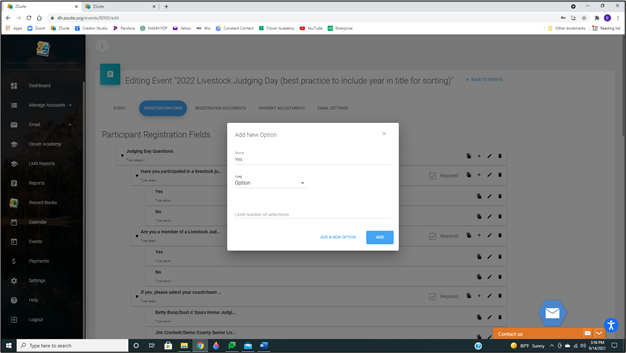
7. Click the '+' to the right of your question to add an answer option (see sample below)
8. A window will pop up. In this example the name will be Yes, and the type is option.
9. Click the blue ‘Add’ button.
10. Repeat steps 7 through 9 to add the No option.
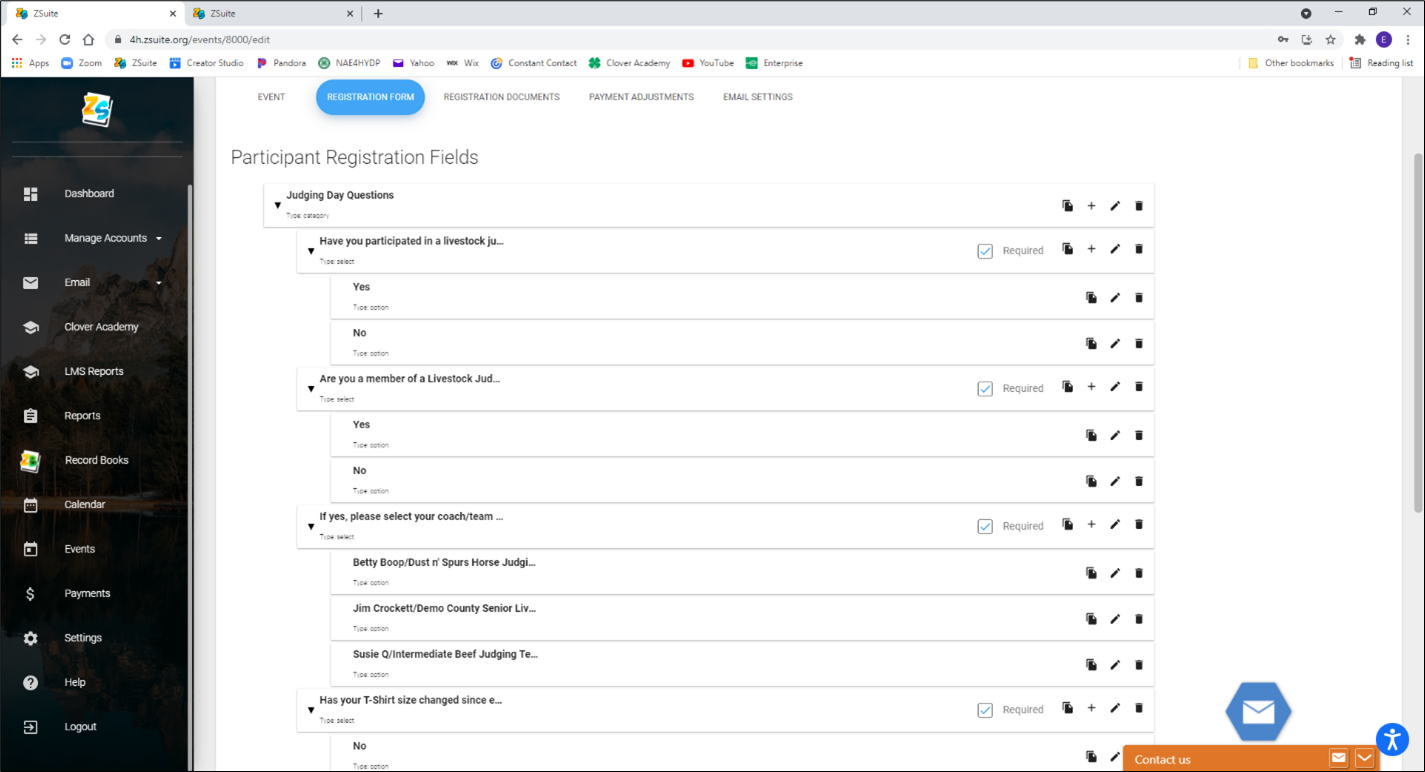
11. Repeat steps 4-6 as many times as needed to create additional questions as needed followed by repeating steps 7-9 to add answer options (see below).
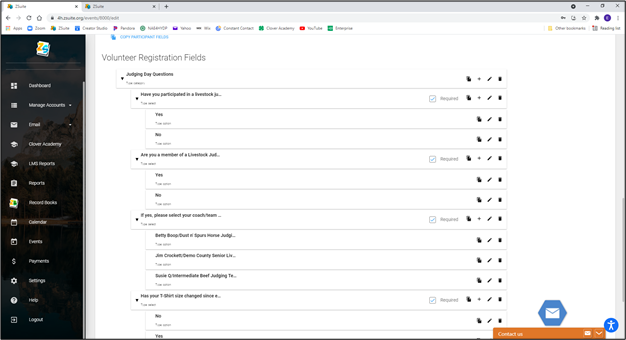
Volunteer Registration Fields
12. The second part of building your registration forms is to create registration questions for volunteers. Simply click the blue text ‘Copy Participant Fields’ all of the fields you just created will populate in the Volunteer Registration Fields section. You can delete questions or add questions as needed.
13. Click blue ‘Save as Draft’ button to save your changes.
Created with the Personal Edition of HelpNDoc: Create cross-platform Qt Help files